3D printing, making thumbnails of models
One of the reasons I got a 3D printer was to learn what it would take to run a small 3D printing side-hustle. I had zero ideas about where to focus or what to print; but I saw a similar experiment run by a YouTuber. When my oldest child started asking for 3D prints I knew it was time.
The easiest and cheapest way to run a business like this is via online orders. Not anything as big as selling through a large online retailer. Just a little website to accept orders and send quotes/invoices from. Didn’t even need to build online payments into the thing because I won’t accept payment before a quote is agreed upon, and it’s likely to only be for folks local to me.
I’ve mentioned, before, that nobody around us is doing resin printing, so I think I have a potential market gap. I also speak to a few tinkers in the retro gaming space, so I could possibly sell tools to them. Finally, my mother is deeply embedded in the unattended craft market scene, so I can get in there with her help.
I have a couple options, when it comes to how I sell these things online. I am a web developer by day; so I could build an online store from scratch. Alternatively, I could save a bunch of time by paying someone like Shopify or WebFlow to host my stuff. Given the recent WordPress nonsense, I don’t think that’s a viable platform to start building in just yet. Maybe after the fork or firing.
This is besides the point. However I choose to host this thing, I am going to need a way to render a thumbnail of a 3D model. This is so that people who upload their own models can pick/confirm the model they’re ordering a print of. It’s so that I can quickly confirm that I have completed the correct model I’m about to ship etc.
I thought this would be a simple process, but I was very wrong. There is no FFMpeg of 3D modelling. The Prusa software is about the closest, but it doesn’t do all of what I need.
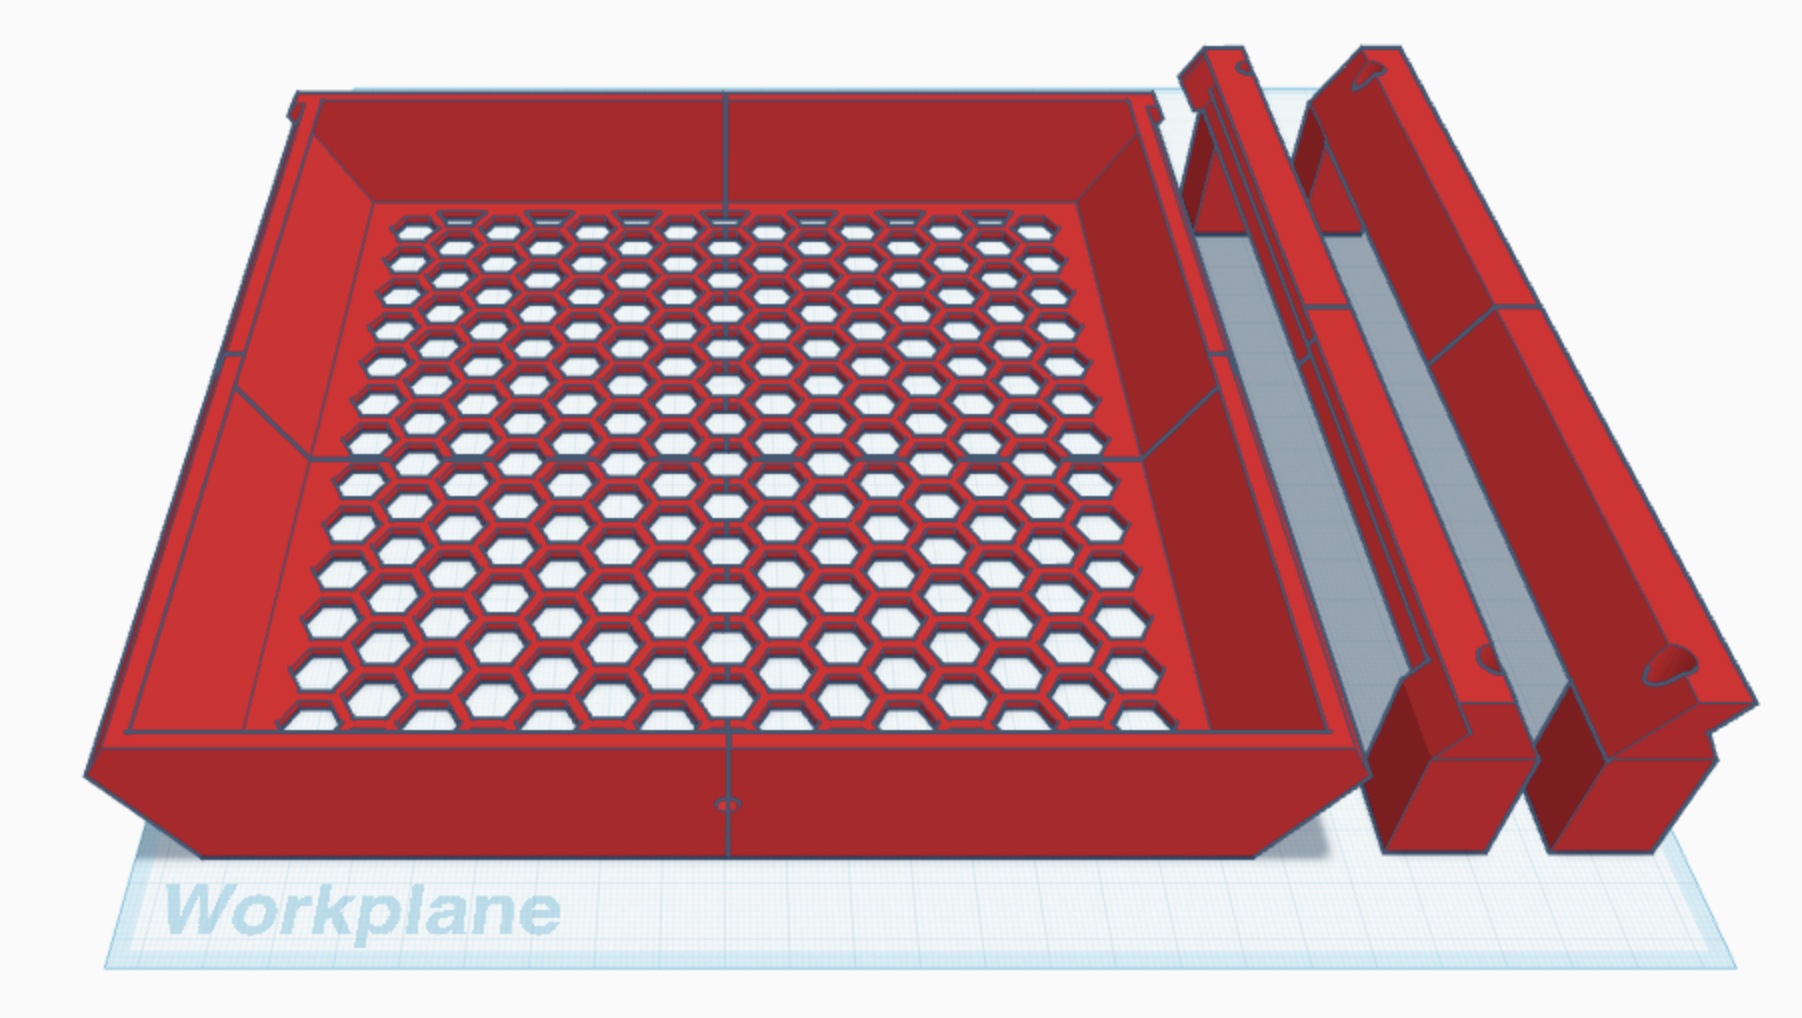
A Tinkercad project
I need some way of generating a thumbnail (or snapshot) of a model from a single STL file. Or, some other common 3D model file. I kid you not; the first thing I searched for was “ffmpeg of 3D modelling”.
Foolish man.
At the bottom of a deep rabbit hole, I found some open source software that would do this, under a specific set of circumstances. It’s called https://github.com/aslze/minirender.
It’s been a while since I figured the following technique out, so I’m trying to remember the full list of constraints.
From what I recall, I can generate an image of the model if:
- I have an STL file
- I set a solid background color
- I render a fixed size with a fixed margin
These are all fine for what I need. The biggest issue was needing to use a fixed background color, but there’s a way around that…
I had to compile minirender:
git clone [email protected]:aslze/minirender.git \
  && cd minirender \
  && cmake . \
  && make render \
  && chmod +x ./samples/render
If all goes well, we should have an executable in ./samples/render, which can be moved or aliased or whatever. It has a help switch, but I ended up with these parameters:
./render -w 2304 -h 1296 -bgcolor 0,255,0 -o first.png model.stl
first.png is the name of the output file, model.stl is the name of the input file, 2304 x 1296 is the output image size, and 0,255,0 is a very bright green background color. I didn’t want this ugly background color, so I made a small (16x16 pixel) tileable image, and repeated it for hte desired final image size:
magick -size 2560x1440 tile:grid.png tiles.png
This magick command is ImageMagick. It says to produce an output file, called tiles.png from a repeatable input tile called grid.png. To combine these two images, we need to remove the green background from the model snapshot:
magick first.png -fuzz 25% -transparent "#00FF00" second.png
Using ImageMagick, again, we fuzzily match the bright green colour, and replace it with transparent pixels. The resulting image is saved as second.png. We can combine this with the tiled background:
magick tiles.png second.png -gravity Center -composite third.png
This -composite operation takes all images in order, and the -gravity Center switch centers them all on each other. This means the smaller model snapshot image will have a bit of margin (2560 - 10% = 2304) around it.
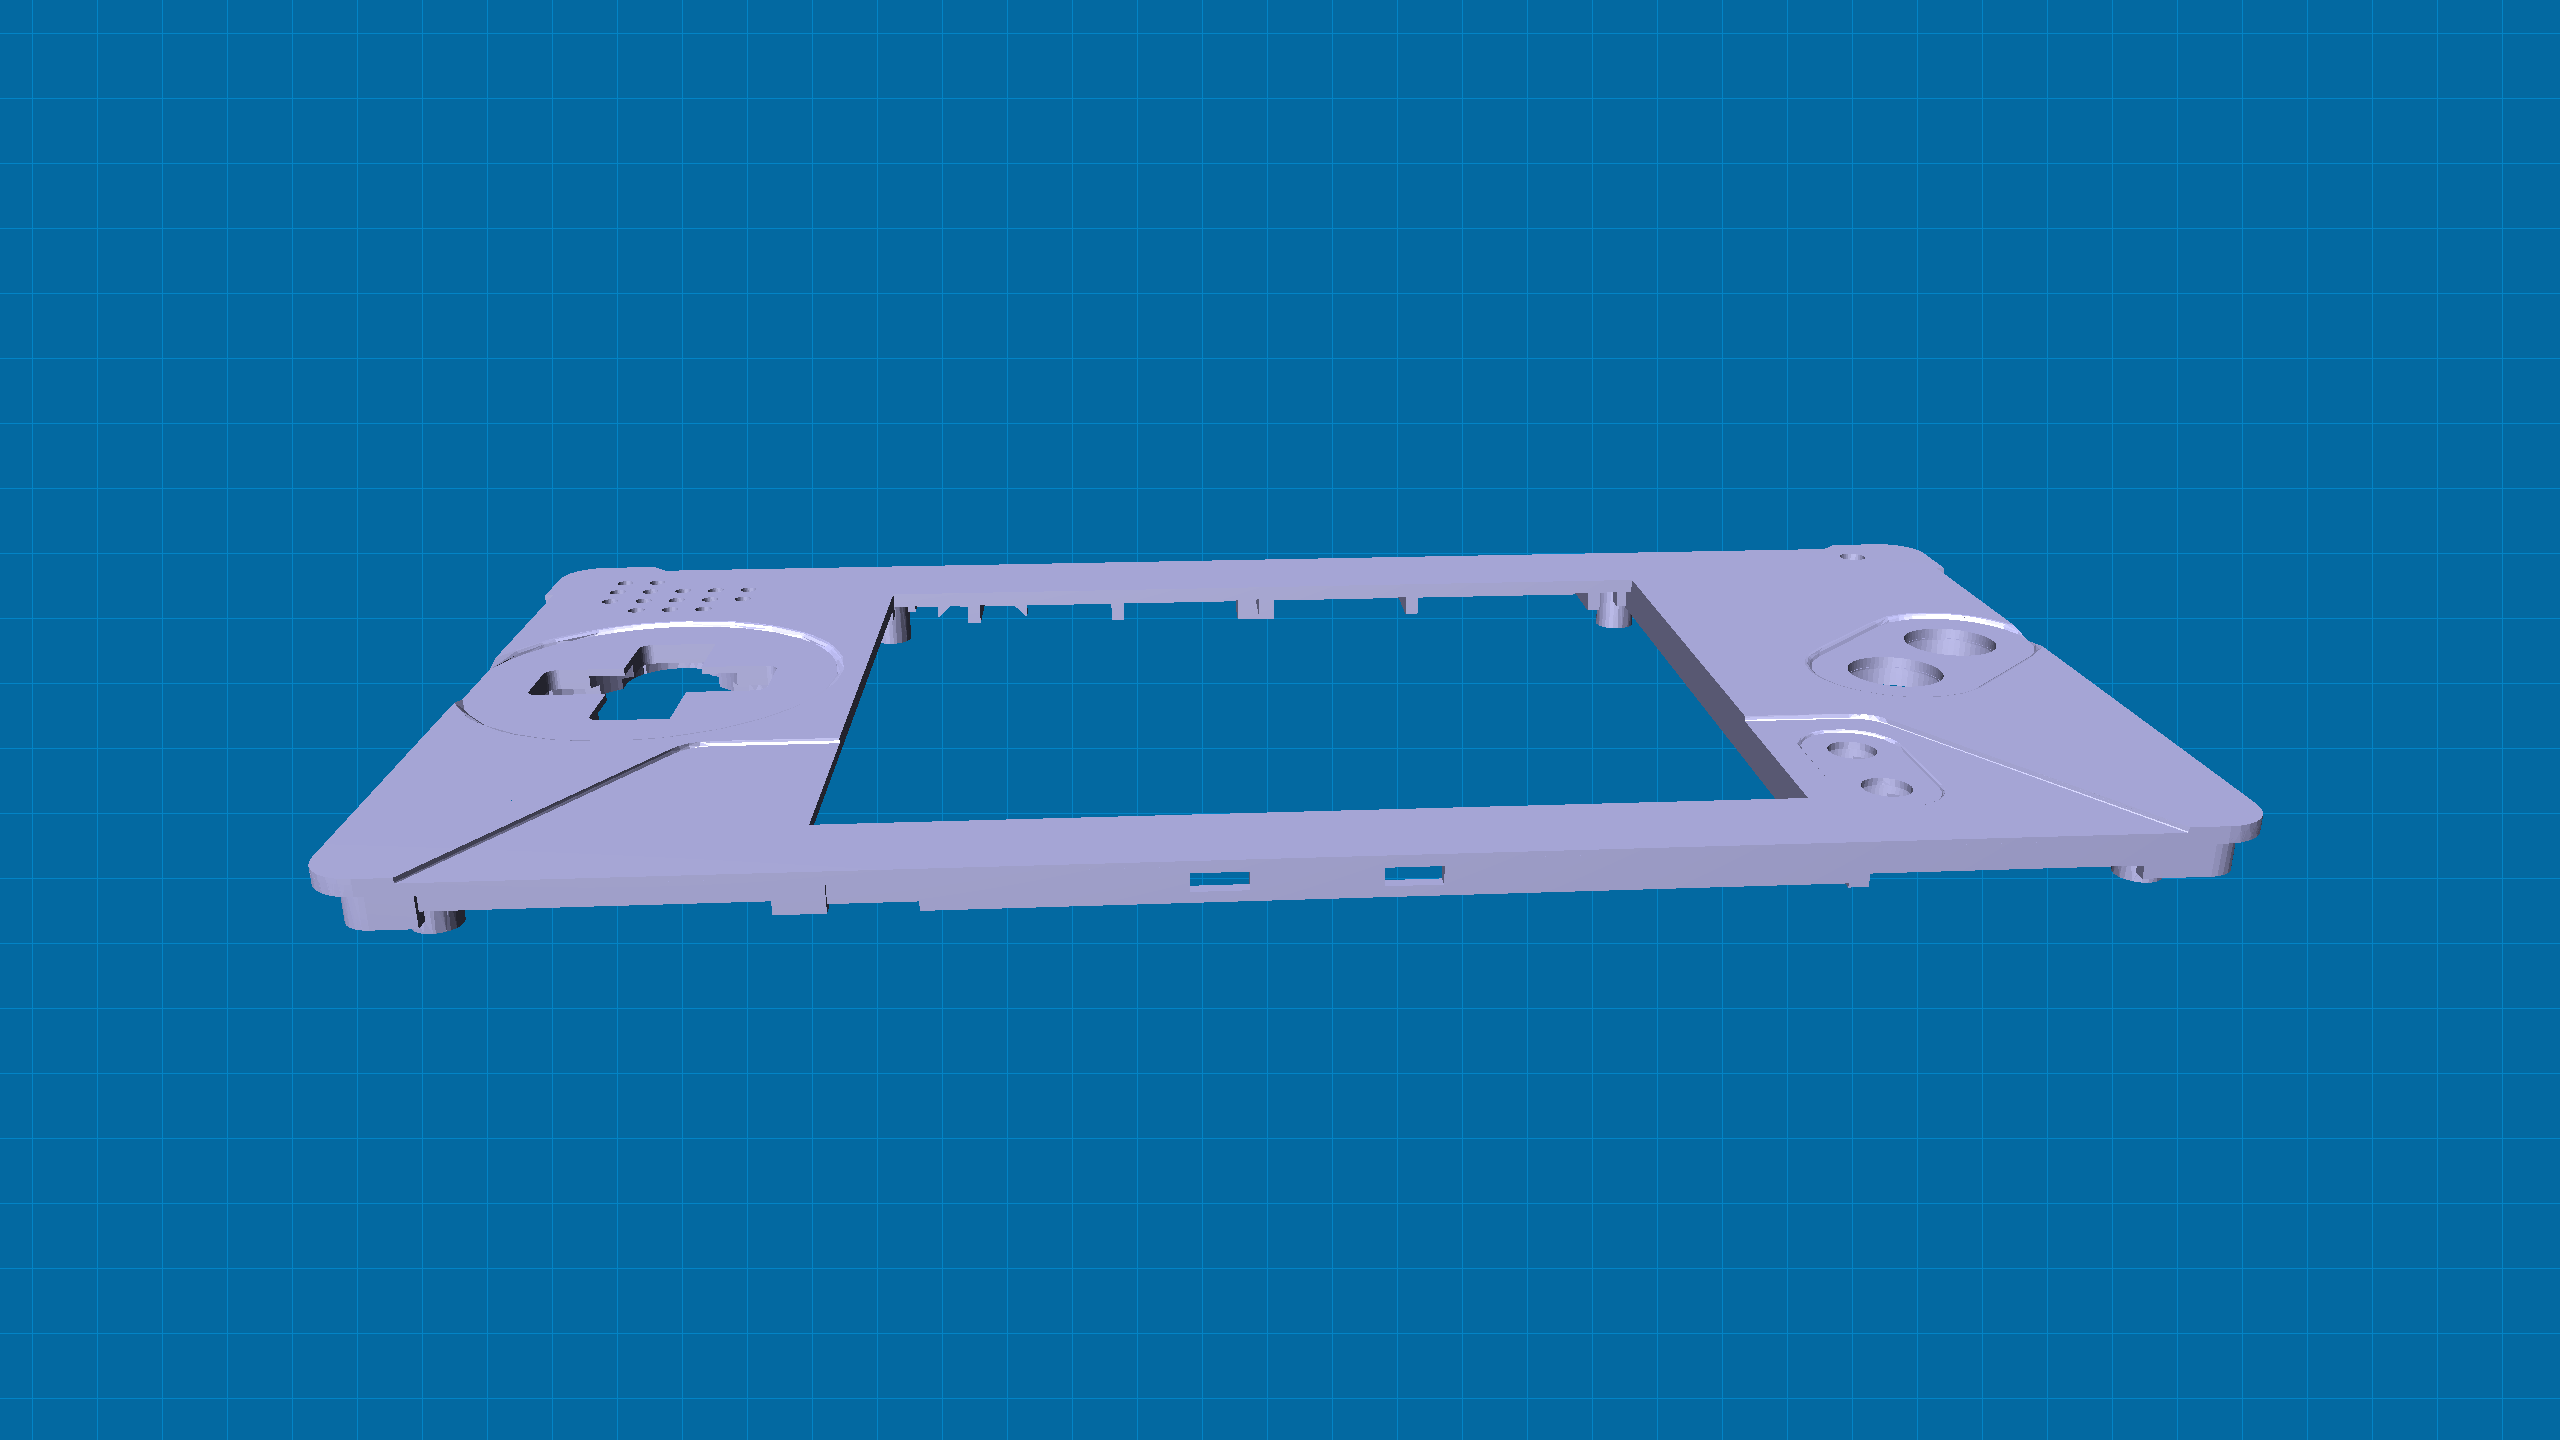
Model snapshot
I haven’t tried changing the model’s color, but I suspect it would involve patching these lines (specifically diffuse) and re-building minirender: minirender/src/Scene.cpp. I felt like such a wizard the first time I saw this composite image.
From here on out, it’s just details. The in-between step images can be deleted. This could be served from an API, or run as a queued job on the web server. I’m not there, yet.
Looking at the minirender executable parameters; it occurs to me that I could do a fancy thumbnail rotation as the user’s mouse moves left/right over the thumbnail. This would involve changing -yaw and -tilt in multiple image renders. I could use the percentage away from center to figure out which thumbnail image to show…
Using other model formats
minirender seems to be able to use STL or OBJ files, but you might be designing on software the outputs a different format. I found out that you can use the Prusa software to convert other formats to STL, which puts you right back at step 2 (converting an STL to PNG).
Final thoughts
I’m obviously not the first person to travel down this road, but I might be the first to document it so openly. Or, we’re just trapped in AI slop search hell and the info is out there while simultaneously impossible to track down. 🤷♂️